Hello quilting friends! Last spring (through the wonders of Instagram) I stumbled upon a talented artist who designs inspirational art prints and tea towels for the home, Stephanie of Fancy That Design House. I especially loved the hand inked, vintage look of the tea towels, so I ordered two!
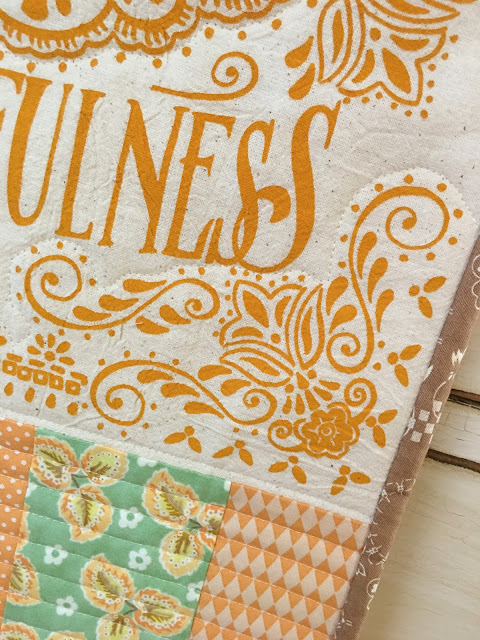
As you might expect, I didn’t use either of them as tea towels. One of them I framed, and one of them I put in my special “do something cool with this” tub in my sewing room. Well last weekend that second tea towel began calling my name, and I came up with this banner.
Old hymns have a way of bringing us back to special times and places in our past, don’t they? They bring me back to the small country church I attended as a girl. The church with the white curved railing around the alter and the high, beautiful stained glass windows. Old hymns bring a sense of comfort and belonging.
And isn’t it true that we don’t actually need to hear the tune . . . we can just see a few lines from a favorite hymn and suddenly the melody and the words are filling us up? Maybe that’s why I was so drawn to Stephanie’s art! I look at my “Great is Thy Faithfulness” banner and I am filled with the sounds of a small church choir lifting their collective voices to the best of their ability, in praise.
I\’m also reminded of my Grandma Audrey, who was a choir director, and my Grandma Arlene, who frequently sang hymns around her house. Grandma Arlene could also yodel, but that’s a story for another day!
Banner making tips
Now, onto the quilty nitty gritty! I will share with you, very loosely, how I made my banner/wall hanging. I don’t have a tutorial or a pattern. This is one of those times where you just need to play and create!
I trimmed my tea towel to roughly 11 1/2” x 14 1/2”. (Yes, this was the scary part.) Basically I trimmed it so that there was about an inch of white space around all four sides of the printed design.
I sewed a slim border to the top and a pieced border to the bottom. You could make these whatever size looks good to your eye. Or you could sew a simple border around all four sides!
To make the “quilt sandwich” for this project, I used fusible fleece (Pellon 987F) instead of batting. I ironed this onto the back of my banner top. Then I used temporary spray adhesive to add the backing fabric to create my “quilt sandwich.”
I stitched the crocheted lace trim across the top, using my walking foot and matching thread. That lace trim is from an antique store. It\’s one of my favorite finds and I\’ve used it on other projects. Sadly, I don\’t have much left!
Again using my walking foot, I did some simple quilting lines here and there to keep the piece together. I stitched straight lines in the borders, and I slowly stitched meandering lines around a few areas in the towel’s design. I did not want to lose the crinkly goodness of the tea towel, so I was vary sparing in my quilting. Just a bit of quilting should be enough to keep the banner together since I used the fusible fleece.
After trimming the excess backing fabric, I added 2 1/4” binding just like I would any quilt. There are so many fun possibilities with a project like this. I think these tea towels would also be terrific made into throw pillows!
Happy Thanksgiving to all of my American friends celebrating that holiday. And to everyone, I hope you find time to get carried away quilting! Thanks for stopping by!
~Taunja


Simply beautiful! I love how you use your treasures and don't just hoard them. Such an inspiration and beauty to behold.
Thanks so much Anna! Happy Thanksgiving to you!
Taunja,I love how the banner turned out! I've been seeing lovely projects with towels on IG as well. We all have those little projects that are in the back of our minds and one day the inspiration comes. Enjoy your holiday with your family and thank you for always nudging us to try something new!Best,Jen @ferryquilts
Thanks Jen! I appreciate your kind words. Happy Thanksgiving!!
Thanks for all your efforts that you have put in this, It's very interesting Blog…I believe there are many who feel the same satisfaction as I read this article! I hope you will continue to have such articles to share with everyone!บอลพรุ่งนี้
I believe there are many who feel the same satisfaction as I read this article!I hope you will continue to have such articles to share with everyone!baby burlap garlandaccent pillow cases springaccent pillow cases 18×18