 Earlier in December I stopped at an antique store and found a lovely loop of vintage crocheted trim that was still attached to a band of white linen. It likely came off of a very pretty pillow case, and my plan was to reuse part of it on a smaller, decorative pillow. I just needed the perfect fabric for this special little project. Not long after, the sweet folks at Fort Worth Fabric Studio (check them out using the link in my sidebar!) sent me a mini charm pack called “Dogwood Trail II” by Sentimental Studios for Moda Fabrics. This feminine, romantic fabric was just right!
Romantic Patchwork Pillow Tutorial
PLEASE READ ALL INSTRUCTIONS BEFORE BEGINNING!
Finished size: 12″ x 16″
Step 1.
Collect all the goodies:
- (24) 2 1/2″ squares from a mini charm pack or your scraps
- decorative trim (crocheted trim, lace, ribbon)
- 1/3 yard coordinating fabric
(cut into three pieces: 8 1/2″ x 12 1/2″, 10 1/2″ x 12 1/2″ and 10 1/2″ x 12 1/2″) - buttons or other embellishments
- 12″ x 16″ pillow form
- 1/4 yard binding (optional)
Step 2.
Using (24) 2 1/2″ squares, sew together a 4 x 6 patchwork panel for the left side of the pillow. Finished size will be 8 1/2″ wide x 12 1/2″ tall. (Use a 1/4″ seam allowance throughout.)
Step 3.
From your coordinating fabric, cut a piece that is 8 1/2″ wide by 12 1/2″ tall. If your fabric is directional, take that into account when cutting.
Also cut a piece of decorative trim 12 1/2″ long.
Step 4.
Layer your trim onto the left hand edge of the coordinating fabric. (Both pieces are face up.) Then gently layer the patchwork panel right side down onto these pieces, making sure left edges are lined up.
Step 5.
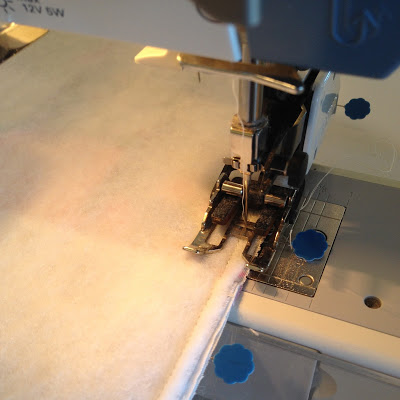
Pin along this left edge and sew all three pieces together.
Step 6.
Open and press gently.
Step 7.
Stitch down your trim piece so that it is secure.
Step 8.
Optional: At this point I ironed on a piece of Pellon 987f Fusible Fleece to the back of the front panel of the pillow. I like the additional stability and structure.
You could also use batting. You may wish to quilt your pillow top. I did not quilt this pillow top, but I did quilt the Pixie Noel Christmas version.
Step 9.
Add buttons. I used pale pink embroidery floss to attach the silvery buttons.
Step 10.
To make the back of the pillow, cut (2) pieces that are 10 1/2″ wide by 12 1/2″ tall. (Remember, if your fabric is directional, take this into account when cutting.)
Sew a 1/2″ seam on the right edge of one piece and a 1/2″ seam on the left edge of the other piece. These two pieces will overlap in the middle and need finished edges.
Note: These instructions call for a simple \”turn inside out\” method for making the pillow cover. You may also choose to do the binding method (similar to binding a quilt) that is quite popular. I have a photo of that type of finish posted here.
Step 11.
Overlap the two back pieces so that when overlapped, the entire piece measures 16 1/2\” wide. Then lay the front of the pillow face down onto these two pieces. You can adjust the back to pieces to the left or to the right slightly to make sure all outside edges line up nicely.
Step 12.
Pin and sew around all four sides.
Step 11.
Your back will look like this. Turn your pillowcase inside out through the overlapped pocket you created in the back.
Step 12.
Push out the corners, insert your pillow form, and you are done!


Love this! Thank you for the detailed instructions!
I love this pillow! It's so pretty! Thank you for the tutorial! It is one I would love to make.
You are so welcome dear! Thanks for reading today!
Thanks so much Aideen! I hope you share yours on IG! Happy sewing!
This will be a perfect pillow to make for my granddaughters! I do have some of my grandma's buttons too. Thanks for the tutorial. It's a lovely pillow!
Thanks Pam! Pillows are so much fun to make and such a nice gift! Are you on Instagram yet!?! I need to see these projects you are making! 🙂 🙂
I really liked this pillow, it is so feminine!'
Thank you! 🙂
Beautiful
At first the machines weren't so popular with the public but Hoover used door-to-door salesmen to boost his sales 100 silk pillowcase These hand embroidered and crocheted pillowcases are made with a lot of love to make a special gift
I am most excited about is seeing everyone's versions.
Thank you, just finished 2 of these sweet little pillows .
I’m so glad to hear that DeeDee! Thanks!